Bare metal micro:bit: Difference between revisions
m (Mike moved page Bare Metal micro:bit to Bare metal micro:bit) |
No edit summary |
||
| (7 intermediate revisions by the same user not shown) | |||
| Line 2: | Line 2: | ||
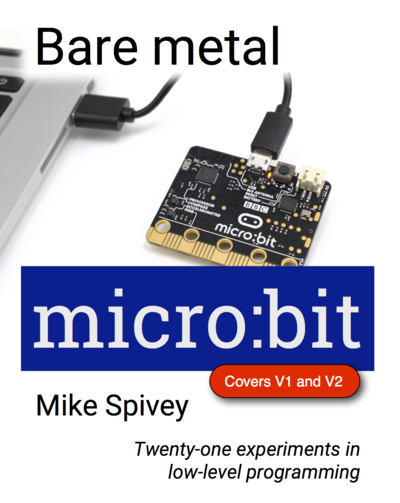
[[Image:cover.png|400px|thumb|right|Front cover]] | [[Image:cover.png|400px|thumb|right|Front cover]] | ||
===Twenty-one experiments in low-level programming=== | ===Twenty-one experiments in low-level programming=== | ||
Welcome to the online version of my book, "Bare metal {{microbit}}", an experiment-based introduction to programming embedded devices at the machine level. The book shows you how to program the ARM-based BBC {{microbit}} in assembly language and in C, and later how to use a simple, embedded operating system. | |||
The book contains 21 experiments, each described in a separate chapter that is linked from this page: the blue links are ready to follow now, and the red links lead to experiments to be added in the future. At the end of this page are links to [[#Online resources|supporting pages]] that cover the hardware you will need, how to set up the software tools you will use to program it, and definitive documentation for the {{microbit}} board. After you have set up software and hardware, you are ready to begin the [[X1000|Experiment 1]], an easy task where you compile and upload a simple C program to check that everything is working properly. | |||
* [[About the book]]. | |||
{{ChapLinks}} | |||
==Online resources== | |||
==Online | |||
* [[Appendix A: Hardware setup]]. | * [[Appendix A: Hardware setup]]. | ||
* [[Appendix B: Software setup]]. | * [[Appendix B: Software setup]]. | ||
Latest revision as of 09:00, 15 August 2022
Twenty-one experiments in low-level programming
Welcome to the online version of my book, "Bare metal micro:bit", an experiment-based introduction to programming embedded devices at the machine level. The book shows you how to program the ARM-based BBC micro:bit in assembly language and in C, and later how to use a simple, embedded operating system.
The book contains 21 experiments, each described in a separate chapter that is linked from this page: the blue links are ready to follow now, and the red links lead to experiments to be added in the future. At the end of this page are links to supporting pages that cover the hardware you will need, how to set up the software tools you will use to program it, and definitive documentation for the micro:bit board. After you have set up software and hardware, you are ready to begin the Experiment 1, an easy task where you compile and upload a simple C program to check that everything is working properly.
Part 1: Machine code programming
- Introducing the micro:bit
- Experiment 1 – Building a program. Check you can build and upload a simple program (written in pure C) that echoes lines typed on the terminal.
- Experiment 2 – Machine instructions. Investigate the effect of single machine instructions using an interactive program.
- Experiment 3 – Loops. Write programs for multiplication and division that contain loops.
- Experiment 4 – Numbers. Explore number representations and conditional branches.
- Experiment 5 – Subroutines. Learn how to define and call subroutines to give structure to a larger program.
- Experiment 6 – Memory and arrays. Exploit instructions that load and store data in RAM.
- Experiment 7 – A buffer overrun attack. Build a working (but harmless) model of a computer virus.
Part 2: Input/output devices
- Experiment 8 – Digital input/output. Use device registers to control I/O pins and light LEDs.
- Experiment 9 – Pure assembly language. Flash an LED with a minimal program written in assembly language.
- Experiment 10 – Serial communication. Use a serial device to transmit characters.
- Experiment 11 – Interrupts for I/O. Control the serial device with interrupts to free the processor.
- Experiment 12 – Interrupt mechanism. Plot gaps in a waveform to measure the time needed to handle interrupts.
- Experiment 13 – Neopixels. Use assembly language to make a bit-banged implementation of the protocol for WS2812 'NeoPixel' LEDs.
Part 3: An embedded operating system
- Introducing micro:bian
- Experiment 14 – Processes. Use micro:bian processes to perform multiple tasks concurrently.
- Experiment 15 – Messages. Use messages to communicate between processes.
- Experiment 16 – Synchronisation. Synchronise the actions of multiple processes by making them exchange messages.
- Experiment 17 – Device drivers. Manage I/O devices using driver processes that receive interrupts as messages.
- Experiment 18 – I2C-based spirit level. Access the micro:bit accelerometer over the I2C bus to make a 2D spirit level.
- Experiment 19 – Servo motors. Use a timer to generate the signals needed to control servo motors.
- Experiment 20 – Radio. Communicate between multiple micro:bits using the in-built radio.
- Experiment 21 – Remote-controlled car. Use servos and radio to make a remote-controlled car.
Bonus programs
- Experiment 31 – Analog to digital converter. A device driver for the analog to digital converter.
- Experiment 32 – Infrared remote control. A program that uses GPIO interrupts to decode signals from an infrared remote control.
- Experiment 33 – Neopixel clock. Software for a Neopixel-based clock.
Online resources
Copyright © 2019–21 J. M. Spivey. All rights reserved.
